
Writing reports suck. Especially when communicating vulnerabilities to both technical and non-technical audiences.
No one likes to do it. I’m with you there.
Over the years, I have learned a lot of tricks to minimize the effort of producing reports. I’ve stopped using Word templates and migrated over to markdown and then converted it to human-readable PDFs based on templating and automated report generation with Pandoc + LaTeX.
In fact, John Hammond has produced a video using a process very similar to mine that he uses to produce his own OSCP/OSWE/OSED documentation.
Regardless of HOW you produce your reports, one common question is how to get reporting data out of Burp Suite.
Today, I will show you how I extract as much data as I can from Burp for my own reporting.
Have you ever heard the saying, “You get what you pay for”?
When it comes to Burp Suite, there has never been a truer statement.
Portswigger offers Burp Suite in three editions, Community, Professional, and Enterprise. The more you pay, the more reporting capability you get.
If you are fortunate enough to work at a company that owns licenses to Burp Suite Enterprise Edition, you have access to not only Standard scan reporting but to Compliance reporting for the OWASP TOP 10 and PCI DSS. And you can export all issue data from one place. You can learn all about generating reports in Enterprise Edition by reading their docs here.
However, most of us don’t have Enterprise Edition.
No, most of us SHOULD have Professional Edition. If this is your profession, you should be paying for your professional tools. I’ve talked about this before in the Beginner’s Guide to API Hacking and a more recent article on writing automation scripts using Professional Edition’s new BCheck script feature.
If you have Community Edition, you simply are missing features like the automated web vulnerability scanner and have no scan reporting.
For the rest of this article, I will show you how to extract as much reporting data as possible from Burp Suite Professional Edition.
YMMV if you are using a different edition.
OK, before I get all the flame/hate mail, let me address something for the bounty hunters out there. I get that most of the influencers out there all tell you FREE Community Edition installed in KALI Linux is enough.
There are entitled to their opinion.
But after you get paid for your first bounty, instead of burning it at the bar, why not invest in yourself and buy Burp Suite Professional? While Community Edition does work if you plan to do this for a living, invest in the tools that really improve your workflow and methodology.
What do I mean? You are missing out on stuff like:
And the list goes on and on. On top of that, remember that Portswigger offers Web Security Academy FOR FREE. They pay staff to work on the academy labs. If you are getting value from all that FREE education (and you should), paying for Professional is just a feel-good knowing you are helping to support Portswigger’s work.
When the Burp scanner runs and finds a vulnerability, an issue is created and inserted into the Targets tab. You can also find these issues on the Dashboard under “Issue activity.”
If you highlight an issue by selecting it and right-clicking it, you can choose the menu item “Report Issue,” which will launch the Burp Scanner reporting wizard.

You can also multiple-select several issues to include more than one in a report.

The reporting wizard will prompt you to “Generate report” in HTML or to “Export issue data” in XML. Let’s generate a report.

If you continue in the wizard, it will prompt you to select the details you want to include in the report:
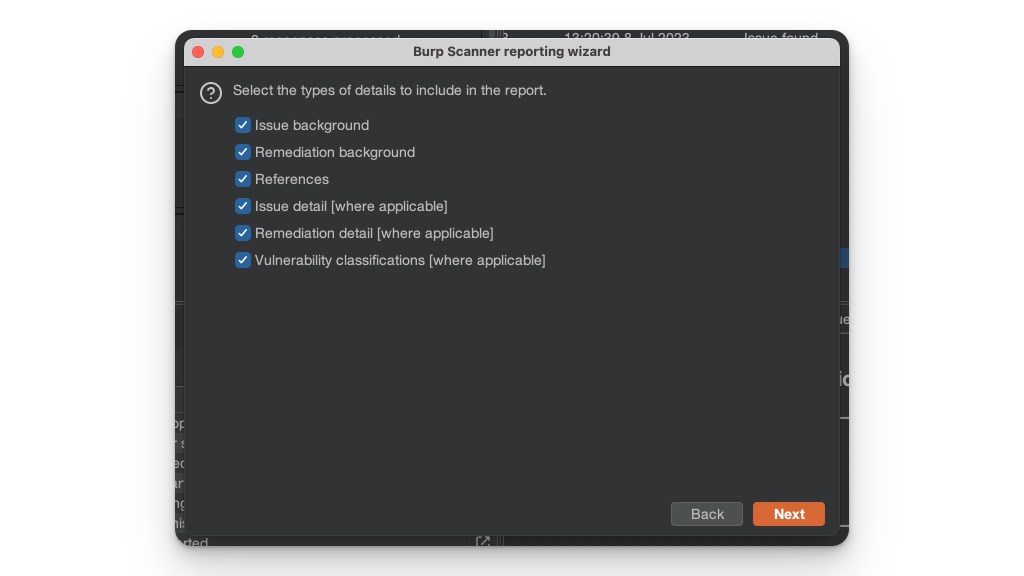
After hitting Next, you will be asked how to report the requests and responses. Usually, the relevant extract” option is good enough, but if you are unsure, error on the side of including too much data and select “Full” requests & responses.

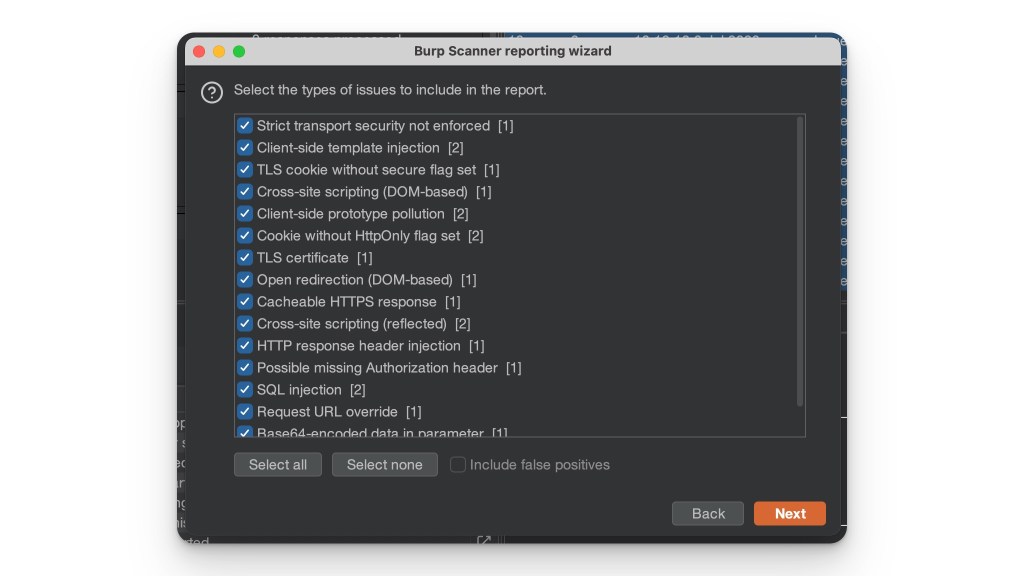
Once you’ve decided how deep you want to report the data, you must decide which issues you wish to report. If you launched the wizard with only one issue selected, you will only see that listed. If you choose more than one, all selected issues will appear in the dialog. You can uncheck any issues you’ve decided you don’t want to report on at this stage.
You’re almost done. Now you just need to decide where to save the report and how you want to show issues. The defaults work pretty well, but you should experiment. I find sometimes it’s good to include the information issues as well, depending on the target and what I want to report. More data is always better than not enough.
The reality is while I save the report data out to HTML, I usually parse it into a markdown format after the fact to include in my full report anyways. So having as much data as possible is always better.

When the reporting wizard completes, you have your first report out of Burp, saved in an HTML file! It might look something like this:

This is a great start. Lots of reporting data extracted directly from Burp. But there are some caveats and limitations you need to know about.
As you have seen, when creating your report of the issues found in Burp you can choose whether you want to exclude the requests and responses, include relevant extracts, or include the full requests and responses linked to the issue.
However, this is only for the scan data produced by the web vulnerability scanner (and any associated BApp extensions tied to the scanner). Requests and responses from the Proxy History tab are not recorded. Nor are sessions in the Repeater or attacks launched via Intruder. None of these tools generate issues to report on.
So how do you report on vulnerabilities you find there? Well, Burp has a solution for that by exporting the data.
If you go to the Proxy tab in Burp and then click on the HTTP history subtab, you can see all the traffic going through the proxy you generate. If you highlight the traffic you wish to report on, you can right-click on it and select “Save Items.”

This will allow you to save all the selected data in an XML format. Ensure you uncheck the option to Base64-encode requests and responses, as you want to report exactly what was sent and received.

WARNING: Any NULL bytes are preserved within this output file, even though this strictly breaks the XML syntax. If your XML parser rejects the NULL bytes, then you will need to remove or replace these bytes before parsing.
Getting reporting data out of Repeater is quite similar to that of Proxy History. You can right-click on a request and click “Save item.”
But don’t do that.
Instead, select “Save entire history.” This will make sure each change/attempt you make in the Repeater session is also recorded and reported.

If you don’t want all that extraneous data (hey, it’s only storage), then make sure that when you hit “Save item” the request/response you want to report is the currently selected one. You can choose the correct request by using the Go Back and Go Forward buttons (‘’).
Getting report data out of Intruder is quite different from everything else. But don’t worry, Portswigger makes it somewhat easy.
After you have completed an attack, Burp will give you the option to save the results table. In the Intruder window in the Results dialog, select “Save > Results table.”

You will be prompted with several options. Here is the configuration I usually use:

A few items to consider:
After we save the results table, we aren’t done. We still need to get the server responses and associate them with the results data. We start by saving out the responses by selecting “Save > Server responses.”

It will prompt where to save the data to. Create a new subdirectory and ensure “Concatenate to single file” stays unchecked. This will ensure that the files saved out will match the individual responses with the filenames matching the response IDs.
Now we need to merge the data.
So in a perfect world, the saved server responses would have filenames matching the request IDs we see in the results table. And for small runs, it could be. However, by how Intruder works, its multithreaded nature can have results come back out of order.
In other words, the server response IDs do NOT match the request IDs. You COULD make them work if you tuned Intruder to use a single thread and not continue until a response completes. But this would break the speed of attacks using Intruder.
This is why you set the “Time of day” column on your export. You can match the timestamp in the results table (saved in an EPOCH time format) and compare them to the HTTP Date timestamp in each server response.
Then you can copy the server response data into a column for the results table data.
In the past, I’ve written a few Python scripts that automate much of this and merge it into a single CSV. However, in recent years I found that by the time I’ve figured out which Intruder payload triggers a vuln, I isolate my report to only show the server response data for the exploited response the client will care about.
So YMMV. You have the data if you need it. Always better to SAVE everything and decide later what needs to go into the report.
The XML file produced when you save out reporting data includes an internal Document Type Definition (DTD), which defines its structure and attributes. If you are an author of report automation tools that can’t consume the data directly, you can view the XML file in a raw form to see the DTD.
Just remember that many XML parsers b0rk on NULL data. So you need to account for that. You can use the Base64-encode option during a save if it gets too problematic and then decode it once it goes into your final reporting format.
Burp Suite’s reporting capabilities are extensive and powerful. With the ability to save data from the HTTP history, Repeater, Intruder, and even directly from the issues produced in the web vulnerability scanner, you can create rich reports with detailed data that is easily consumable by clients.

Just remember to pay attention to the format of your exports (XML parsers don’t like NULL bytes) and the ordering of your Intruder data to make sure everything is properly correlated.
Burp Suite makes it easy enough for almost anyone to create advanced reports, and with a bit of customization, you can make them truly stand out.
Next week, I’ll show you how to take it one step further and generate vulnerability reports directly from a proof-of-concept (PoC) request you constructed in Burp Suite and automatically export them into markdown format that can produce a complete report for you using templating.
Find this sort of Burp hackery helpful? Then subscribe to the FREE API Hacker Inner Circle newsletter and join thousands of other developers, testers, and hackers who want to level up their Burp Suite hacking skills too.